Астрофотография, заснемане на Млечният път - полезни съвети
Home » Astrophotography, photographing the Milky Way – useful tips
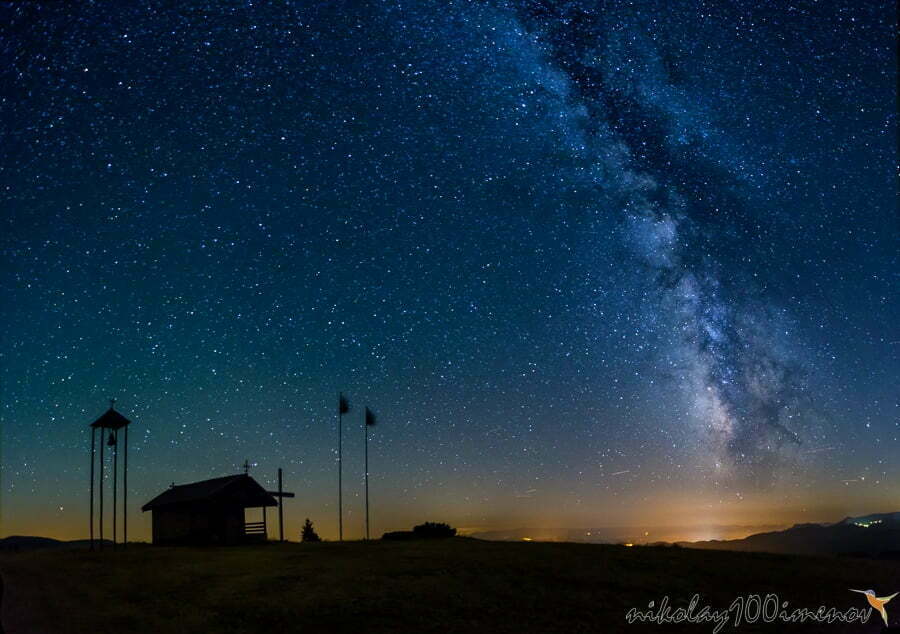
I have always admired the astrophotography and pictures of the Milky Way. Since I bought my first Canon 400D camera, I wanted to shoot the starry sky and the galactic center of the Milky Way. However, it was not as easy as I thought. There are many lessons, articles, and videos on the internet about what’s needed to shoot the Milky Way. But here I will try to share a few tips from my personal experience which you probably will not find in other articles and websites.
What camera do you need to shoot astrophotography and the Milky Way?
As I mentioned, my first camera was Canon 400D – unfortunately, it was extremely inadequate for a quality shot of the Milky Way. After my upgrade to the Canon 500D, mostly because of the ability to shoot video, capturing the night sky was a mirage again. Don’t get me wrong the two cameras were very good for shooting in normal conditions during the day, but due to the APS-C crop sensor, high ISO images were unusable because of the noise the sensor was producing. Then I still lived with the delusion that when I buy a full frame camera this problem with the noise in the photos will disappear and I can shoot the stars without any problem. Unfortunately, the full frame or camera with a 35mm sensor for me was just a dream at that time, because of its exceedingly high price. But one day I managed to buy a Canon 6D that has a full frame / 35mm sensor. Yes, this camera really tolerates the high ISO, but I would not say that there is no noise problem at all. With ISO1600-3200 in an unlit environment, the noise from your sensor is pretty serious. Of course it’s not like the crop sensors, but it’s noticeable for sure.
Conclusions and useful tips
1. The truth is, that even with a low-end DSLR such as Canon 400D, 500D, 60D, and others, you can shoot the starry sky and the Milky Way by using the stacking method which I will talk about bellow. Unfortunately, when I owned this type of cameras, this photo processing technology did not exist or was not well developed as it is now.
2. Full-frame cameras do much better with noise and high ISO photos and it’s definitely worth the investment. There is no denying it. But dont’s think that buying a 3000-4000 lv camera will solve your noise problems completely. Unfortunately, this is not the case at all. I would even say that over ISO3200 the Milky Way images are unusable even after the processing, if you want to print them. Only online use is acceptable by my standards.
What lens should I use to capture the night sky and the milky way?
There is no doubt about it – you need a very fast lens, preferably F2.8 or less. All the lenses above which can not go to F2.8 just don’t let enough light to the sensor and it will either force you to increase the ISO or leave the shutter open for longer, which will lead to star trails.
Also, to cover at least part of the Milky Way, you will also need a wide-angle lens of 17mm or less for full frame cameras and about 10mm for a crop sensor. Unfortunately, lenses of the 35mm, 50mm range can not capture the whole Milky Way. With 35-50mm you will be able to capture only part of the galaxy, and then you will need to create a panorama of dozens of frames, which in most cases leads to errors and distortions in the final picture.
Generally wide-angle fast lenses cost thousands of leva, but there are some budget options. I personally use a Sigma 17-35mm f / 2.8-4 EX DG lens. The same version is made also by the Tamron. I also recently found another good and inexpensive option – Samyang 14mm, also known as Rokinon 14mm. The lens is manual – ie. there is no autofocus, but for this price is one of the sharpest wide-angle lenses on the market.
Conclusions and useful tips
1. Yes, to shoot astrophotography and investing in a good lens is simply inevitable. Without it, capturing the Milky Way is simply impossible. In most cases, fast wide-angle lenses cost more than the camera itself. But as I said, there are budget options – which have their drawbacks – vignetting, lack of autofocus, and so on. However, they make this type of photography possible and the results are satisfactory.
What else do you need for night shots?
1. Tripod – its impossible without it. The pictures of the Milky Way and night at night require very long exposures from 10 to 30 seconds. In this case, your camera should be extremely stabilized, otherwise the pictures will be very blurry. That’s why the tripod is one of the main components needed to capture the Milky Way. The tripod does not need to be super expensive and branded. The important thing is to be stable and to cary the weight of your camera.
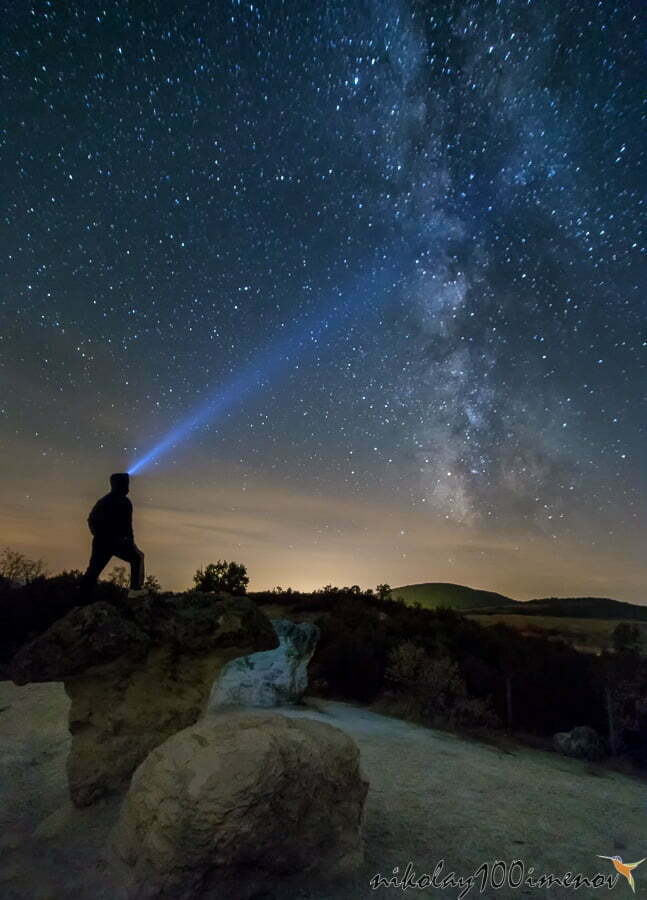
2. Flashlight – not required, but necessary. Without a flashlight after the sunset, it is almost impossible to navigate in the dark. I personally always travel with two, not counting the one on my phone. God forbid if you drop something on the ground, you just have no chance of finding it without a flashlight. I say that from experience 🙂 One time I dropped my lens cap and thanks to the fact that I had 2 flashlights I managed to find it.
What kind of software is required to process photos of the starry sky and the milky way?
The development of astrophotography software has made great leap in the past few years. There are also new, more effective methods to “fight” the sensor noise, which is the main problem with this type of photography. Here I am not going to talk about how exactly the photos are being processed and with what kind of program. I think everyone has heard about Photoshop. Instead, I will emphasize on how to the noise from the photos in low light and high ISO. In general, the approach to clearing noise from astro photos is divided into 2 options:
Option 1
1 frame is captured and processed with noise-canceling software. There are dozens of programs and plug-ins that are specifically designed to remove the noise in the photos. For example:
Software
Photoshop
Lightroom
Capture One 9
Plugins and filters
Topaz DeNoise
Noise Ninja
Nik Dfine
Indeed, the programs listed above are getting better and are doing very well with removing noise from photos. But honestly when taking pictures at a very high ISO, the clearing is at the expense of the sharpness of the frame. The photos become slightly blurred – of course, this can only be seen when viewing at 100%. That’s why the best and preferred option is the next one.
Option 2
Stacking or capturing a series of frames and superimposing them while simultaneously clearing the noise. This method of working with astrophotography has existed for a long time, but it has only been developed and used in recent years by photographers. Generally, this method works like this – all frames superimpose each other and the software calculates where and in which picture there is noise (the noise from the sensor appears at different locations in each picture). Ie. if there is noise in one of the photos, the software searches for another in which the noise does not appear in the same point of the photo and visualizes that point in the final result. Generally this is how all programs for stacking night sky pictures and the Milky Way work. Such programs are:
Registax
Nebulosities
DeepSky Stacker
Keith’s Image Stacker
CCD Stack
MaximDL
Pixinsight
Conclusions and useful tips
For me, option 2 is noticeably better, because the quality of the end result is amazing. With this method, even people who can not afford full frame cameras can achieve pretty good results in astrophotography. The only downside of stacking is that you need to take a few shots from the same position, which takes a long time. In my opinion, the quality of the final frame is the most important, and so the time is totally worth it. I personally use the Photoshop Median or Mean filter option, and when it does not work, I’m using CCD Stack – a little more complicated program, but made especially for astro-photophotography and it is doing miracles removing the noise. I’ll make a separate tutorial on how to use the stacking method in Photoshop and CCD Stack.
Where can I photograph the Milky Way?
The second major enemy of astrophotography is light polution. That’s why most of the Milky Way photos you see are made outside the cities, in the uninhabited areas. Because of the light coming from the cities and villages at night is reflected in the atmosphere and its captured by the camera sensor. The result in most cases is a large yellow spot on the picture, which dominates the frame and prevents the stars and the Milky Way from showing up. Unfortunately, with the urbanization and the expansion of the settlements, there are not many locations left without light. For finding such place you can use the maps in the internet. Just write the Light Polution Map on Google and you will find dozens of maps showing the locations of lightning spots and places without it. Here you can find where it is possible to capture the Milky Way. The ideal option is to have no polution at all, but there are places where it is minimal and you can mandage to get some good photos.
When is the best time to shoot the Milky Way?
For Bulgaria and in general for the Northern Hemisphere, the Milky Way is best seen during the summer months – from May to the end of September. During these months, and especially June and July, the galactic center of the Milky Way is located in the center of the celestial vault. The Galactic Center is the most colorful and most interesting part of the Milky Way, so if you’re planning pictures, it’s best to plan them for the middle of the summer.
What should you know when planning to shoot the Milky Way?
1. Honestly, at first I was thinking that if I plan a trip to take photos as early as possible, this will be the best option. Unfortunately, it was quite the opposite. Since night shots are mostly time dependent, you should keep track of the weather forecast. Keep in mind that it is extremely volatile, and it is quite possible at the last minute your plans will fail. For working people and those with lots of daily tasks it is extremely difficult to find time for night shots. The free time is usually Saturday and Sunday. That is why most of the times my plans to photograph the the Milky Way failed because of the bad weather. During the summer months, the weather is very dynamic and nights with clear skys are very rare. Especially in the mountainous areas in seconds the clear sky is covered with clouds and vice versa.
That is why I personally have greatest success without planning trips far in time. I just follow the forecast for next week, and if the sky is supposed to be clear on Saturday or Sunday, I’m on my way.
2. Warm clothes – I cannot stress enough how important they are. The more warm clothes you have with you the better. I am saying this from experience, because I was so cold during my first photoshoot at night time. Do not underestimate the weather – temperatures during the night decrease dramatically, even during the summer months. Also, in most cases, you will be in a mountainous area, as there are the most places without light polution and where the temperatures are very low throughout the year. So it’s better to be prepared than to freeze or the low temperatures to fail your photoshoot.
3. Depending on how long you plan to shoot (usually at least several hours), it is good to stock up with food and water. It is better to have it and not to use it, than to be thirsty and hungry with no option around to buy anything.
4. Research and explore the location in advance. See what’s interesting there – natural, monument, trees, something to use as a foreground subject in your photos. This is very easy thanks to Google Maps. In most cases, even with Street View you will be able to see exactly where to position yourself to create the desired picture.
5. Plan your time so that you arrive at the spot while there is still daylight. It will make it much easier to scout the location and orient yourself in the area. At night time it’s a lot harder and it takes a lot more time.
6. It is good to check where the galactic center of the Milky Way will appear? It is not mandatory, but it is good to know this information in advance so you can decide where to stand and what you can catch in the frame. It will be a lot easier to do during the daylight and not to bother with flashlight or test shots to see what the final result will be. There is a program called Stelarium – free and very easy to use. It shows the direction from which the Milky Way will rise from every point of the globe.
7. Moon phase – also a very important factor for night shots. Because the moon is also a source of a lot of light which as we mentioned is a problem for astrophotographers. Of course this applies only when you want to photograph the Milky Way or other deep space objects:) If you’ve decided to take night photos and put the moon in the composition, it is not a problem. But when you shoot galaxies, stars, and other deep space objects, the moon must be in the phase of a new moon or it should be under the horizon. Stelarium is very useful to find out wWhere the moon will be at the time you will take pictures. And the exact phase of the moon you can check on the internet – there are hundreds of sites for it.